

There’s a particular kind of quiet that settles over you the first time you see the Milky Way with your own eyes. No screen, no city glow, just thousands of stars stacked into a hazy river of light overhead.
If you’re exploring stargazing for beginners, few hobbies combine outdoor adventure with a sense of wonder quite like spending a night beneath a truly dark sky. This guide will show you where to go, what gear to bring, and how to confidently navigate the night sky.
Why Most People Never See a Truly Dark Sky
Studies estimate that roughly 60% of Europeans and nearly 80% of North Americans can no longer see the Milky Way from where they live because of light pollution. Streetlights, buildings, and general urban glow wash out all but the brightest stars. This is why dark sky camping matters so much for beginners; you can own the best telescope in the world, but if you’re standing under a suburban sky, you’ll barely notice the difference.
The good news is escaping light pollution doesn’t require a trip to the Sahara. Many excellent dark sky sites are just a few hours from major cities.
Finding a Truly Dark Sky
Use a light pollution map
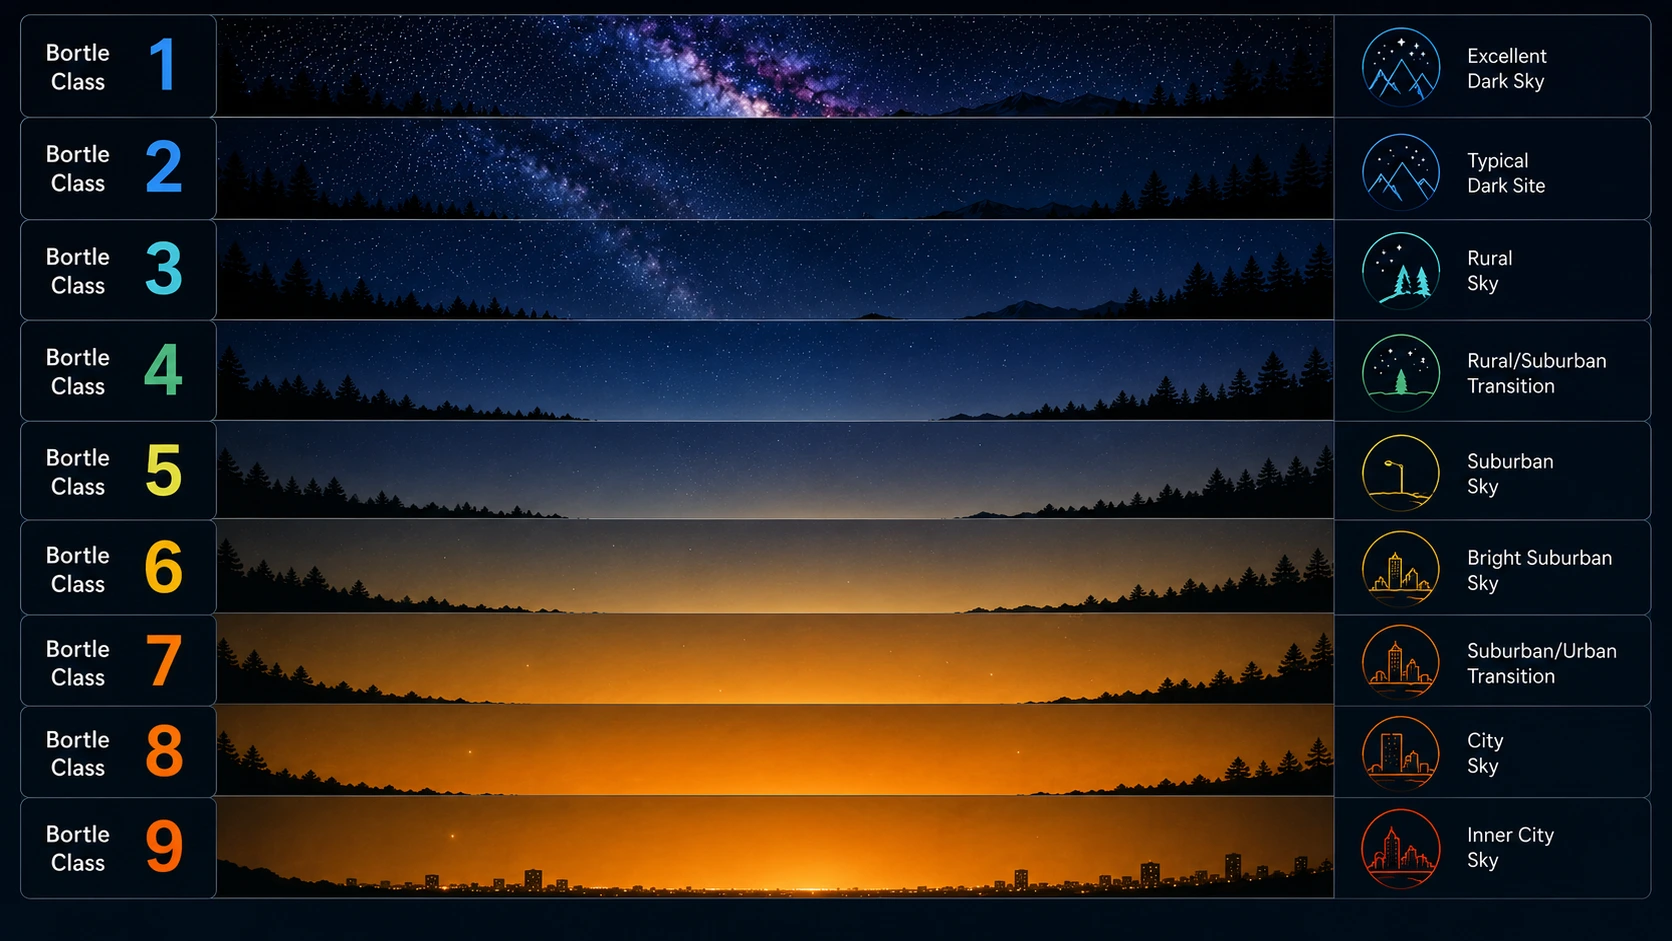
Sites like the Light Pollution Map or apps like Clear Outside, Astrospheric or Dark Sky Meter let you see exactly how dark a location is before you drive there. Look for areas rated by Bortle Class, which ranks night skies from Class 1 to Class 9; the lower the number, the darker the sky.
Look for International Dark Sky Places
Dark-Sky International certifies parks, reserves, and communities that meet strict lighting standards. These locations are basically guaranteed to deliver thick places like Death Valley National Park, Cherry Springs State Park in Pennsylvania, or Galloway Forest Park in Scotland.
Check the moon phase
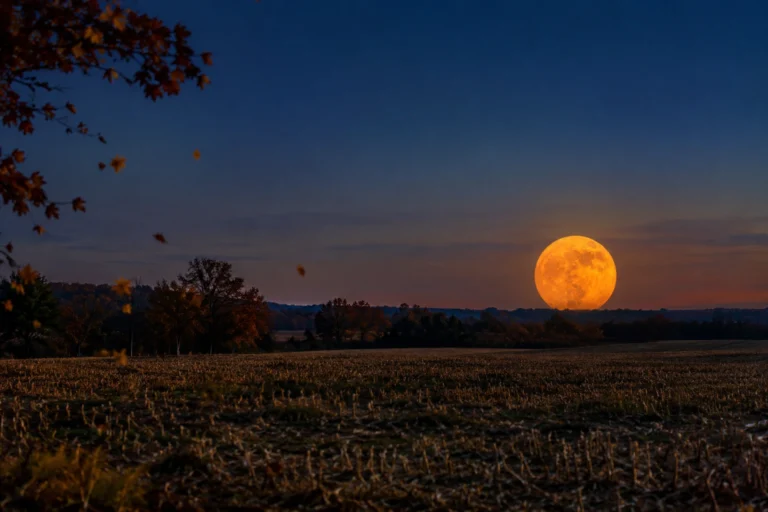
A full moon is almost as disruptive as a city skyline for faint objects like the Milky Way or dim nebulae. Plan your trip around the new moon, or at least a crescent moon, for the darkest possible skies. Moon phase calendars are easy to find online and worth checking a month ahead.
Consider elevation and weather
Higher elevations mean less atmosphere to look through, and drier climates mean fewer clouds and less atmospheric shimmer. Desert and mountain regions consistently outperform coastal or humid areas for stargazing. Before heading out, use an interactive light pollution map to evaluate sky darkness.
Essential Gear for Stargazing Beginners
You don’t need much to get started, and it’s a mistake to buy an expensive telescope before you’ve spent a few nights simply learning the sky with your eyes.
The Basics of Stargazing for Beginners
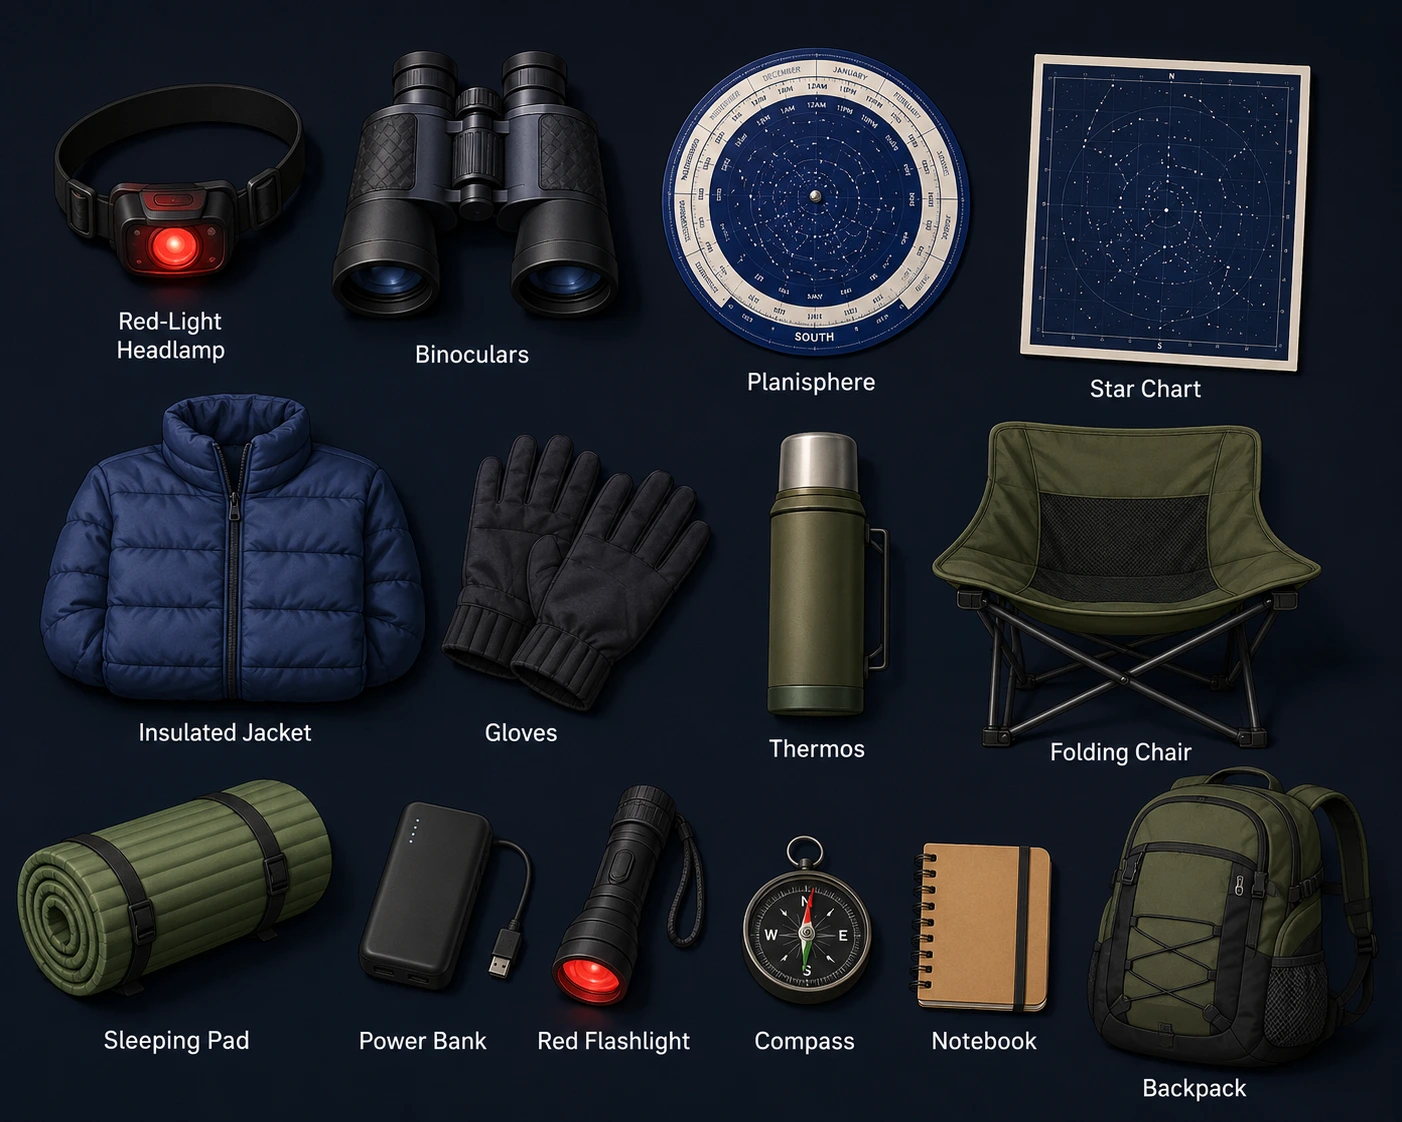
- Red flashlight or headlamp with a red mode. White light destroys your night vision, and it takes about 20–30 minutes to readapt fully. Red light preserves it.
- Warm layers, even in summer. Temperatures drop fast at night, especially at elevation or in the desert. Even in summer, a beanie and light gloves are often worth packing.
- A reclining chair or sleeping pad. Craning your neck upward for an hour is miserable. Lying back changes everything.
- A star chart or planisphere. A simple rotating star wheel, set to your date and time, will teach you constellations faster than any app.
- A stargazing app. Apps like Stellarium, SkySafari, or Sky Guide use your phone’s compass and GPS to overlay constellation names on the actual sky when you point your phone upward.
Once You’re Hooked: Binoculars Before Telescopes
A decent pair of 7×50 or 10×50 binoculars will show you far more than most beginners expect; the moons of Jupiter, star clusters, the texture of the Milky Way, even the Andromeda Galaxy as a faint smudge. Binoculars are cheaper, more portable, and more forgiving than a telescope, and they’re the honest recommendation most experienced astronomers give beginners.
If You’re Ready for a Telescope
- Dobsonian reflectors offer the most aperture (light-gathering power) per dollar and are simple to set up and intuitive to use.
- Avoid the cheap department-store telescopes with flimsy tripods and tiny apertures; they tend to disappoint and turn people off the hobby.
- A 6-inch (150mm) Dobsonian is a common, well-regarded starting point that balances portability, cost, and performance.
Camping-Specific Gear
- A tent and sleeping bag rated for the season and location
- A camp stove and cooler if you’re staying overnight
- A physical map or offline GPS, since many prime dark sky spots have poor cell signal
- Extra batteries or a power bank as cold weather drains batteries quickly
Many of these practical camping tools trace their origins to space exploration. Learn more in our article NASA in a Van: 5 Space Technologies for Off-Grid Living.
Learning to Navigate the Night Sky
The sky can feel overwhelming at first, but it becomes manageable once you learn a handful of anchor points.
Start with the Big Dipper
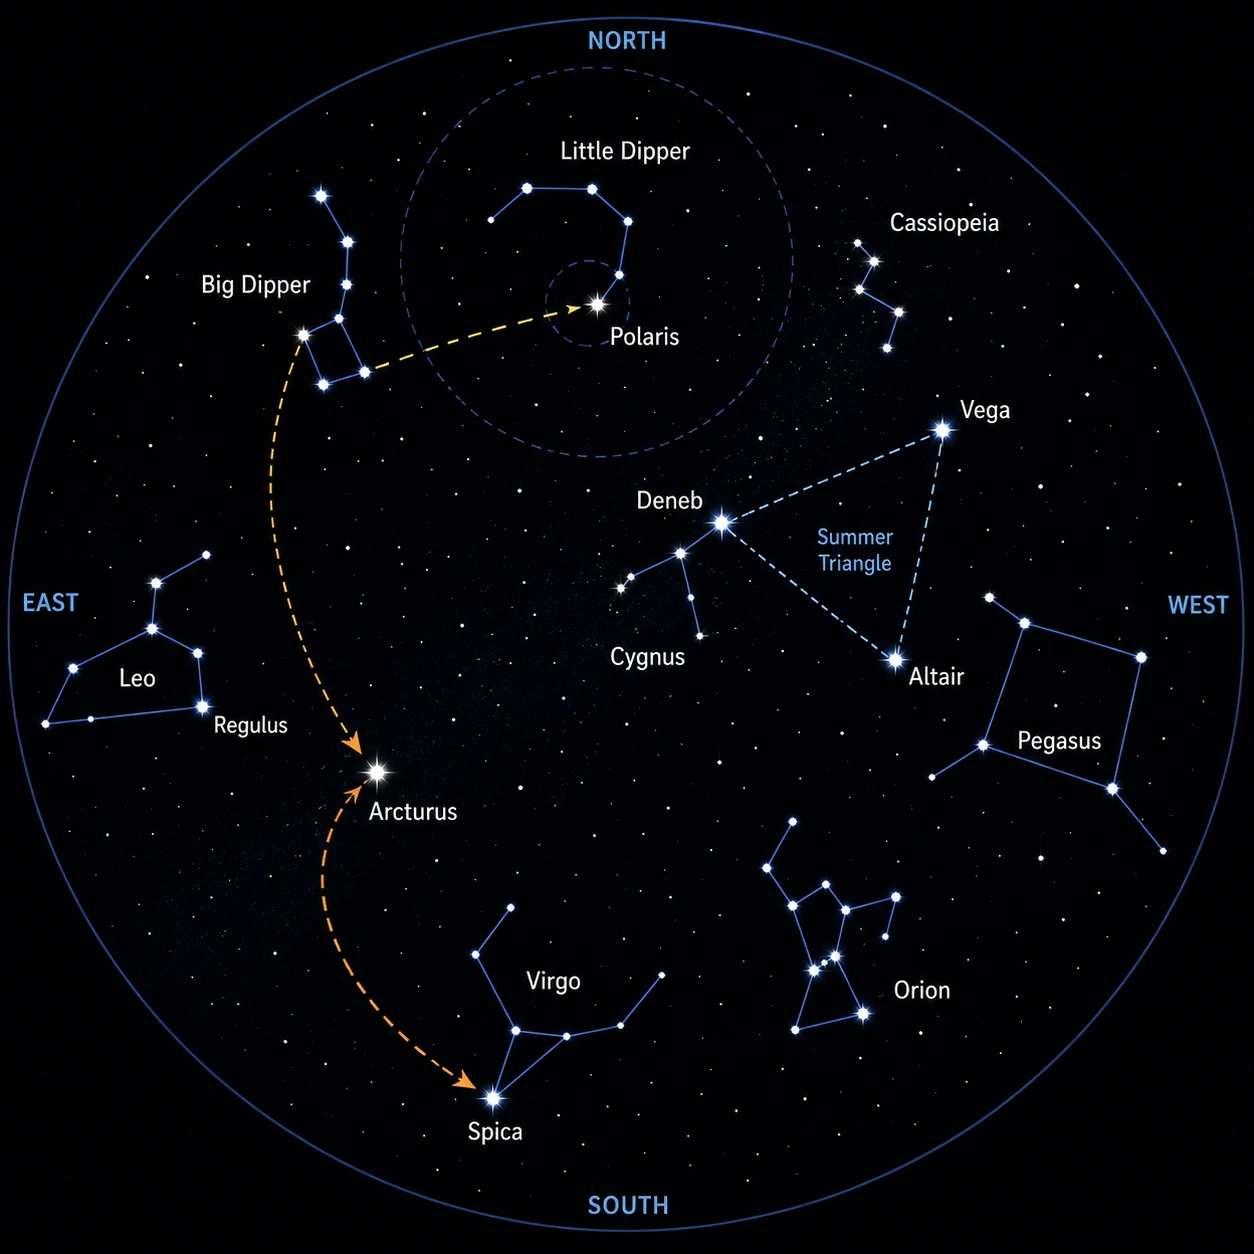
In the Northern Hemisphere, the Big Dipper (part of Ursa Major) is often the easiest shape to spot. The two stars at the end of its “cup” point almost directly to Polaris, the North Star, which barely moves in the sky and marks true north.
Use Polaris as Your Anchor
Once you’ve found Polaris, you’ve found the tip of the Little Dipper (Ursa Minor) and can begin orienting yourself. Everything else in the northern sky appears to rotate around this point over the course of the night.
Learn the Seasonal Constellations
Different constellations dominate at different times of year:
- Winter: Orion is unmistakable, with its three-star belt. From Orion’s belt, you can find Sirius (the brightest star in the night sky) by following the belt downward, and Aldebaran and the Pleiades cluster by following it upward.
- Summer: The Summer Triangle—formed by Vega, Deneb, and Altair—dominates the sky, and the Milky Way arcs directly through it.
- Spring: Look for Leo and the “Big Dipper to Arcturus to Spica” arc, a classic navigation trick (“follow the arc to Arcturus, then speed on to Spica”).
- Autumn: The Great Square of Pegasus is a useful landmark, with Andromeda extending from one corner.
Try Star-Hopping
Star-hopping is the technique of using bright, easy-to-find stars as stepping stones to locate fainter objects, like using Orion’s belt to find Sirius. It’s the core skill that makes navigating the sky feel less like memorization and more like reading a map you already understand.
Don’t Skip Naked-Eye Observing
Before reaching for binoculars or a telescope, spend real time just looking. Let your eyes adjust for a full 20–30 minutes. You’ll be surprised how many stars appear that weren’t visible at first, and how much texture shows up in the Milky Way once your night vision fully kicks in.
If you’d like to capture what you’re seeing, our guide on How to Photograph the Milky Way With Your Smartphone walks you through taking impressive night-sky photos without specialized equipment.
A Simple Plan for Your First Stargazing Trip
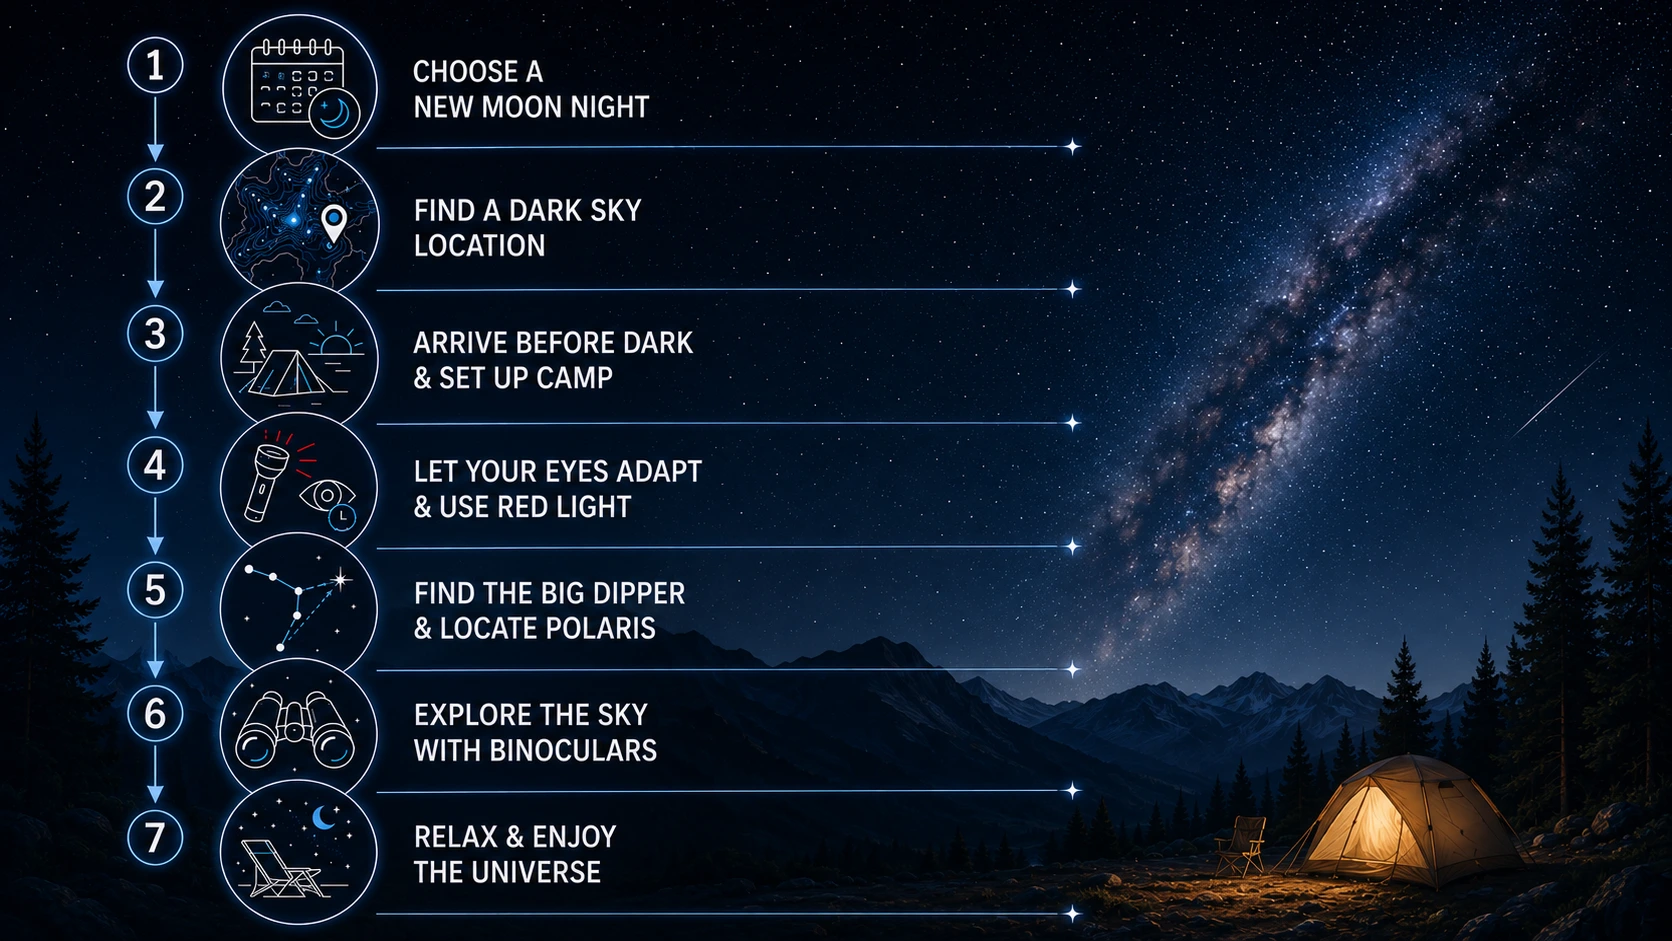
- Pick a new-moon weekend and check the weather forecast for clear skies.
- Find a Bortle 1–4 location within a reasonable drive using a light pollution map.
- Arrive before dark to set up camp and get oriented while there’s still light.
- Let your eyes adjust for 20–30 minutes after sunset, using only red light.
- Locate the Big Dipper, then Polaris, then work outward from there using a star chart or app.
- Spend at least an hour just observing before worrying about photography or equipment.
- Bring warm layers and something comfortable to lie back on — the sky rewards patience.
Final Thoughts
Stargazing is one of the few hobbies that costs almost nothing to start and rewards you the moment you look up. Although Earth’s slow axial precession gradually changes the night sky over thousands of years, many of the familiar constellations have appeared much the same throughout recorded human history; the same stars that guided ancient sailors and inspired early astronomers are still there, waiting behind the glow of city lights. All it takes is a dark enough spot, a little patience, and knowing where to look first.
Take your time, enjoy the fresh night air, and let curiosity be your guide. The universe has been waiting billions of years for you to look up; there is no rush, and the view is always waiting for you.
Frequently Asked Questions
No. In fact, most experienced astronomers recommend starting with your unaided eyes or a pair of binoculars before investing in a telescope. Learning to recognize constellations, bright stars, and the Milky Way first makes using a telescope much easier later. A good pair of 7×50 or 10×50 binoculars can reveal star clusters, Jupiter’s four largest moons, the Andromeda Galaxy, and many other celestial objects.
The Bortle Scale measures the darkness of the night sky, ranging from Class 1 (the darkest) to Class 9 (the brightest urban skies). For the best stargazing experience, aim for Bortle Class 1–4 locations. These areas offer excellent visibility of the Milky Way, thousands of stars, and many deep-sky objects that are invisible from cities.
Yes. The Milky Way is visible to the naked eye under sufficiently dark skies during the appropriate seasons. To maximize your chances, visit a location with low light pollution, choose a clear night close to the new moon, and allow your eyes about 20–30 minutes to fully adapt to the darkness.
Red light has less impact on your eyes’ dark adaptation than white light. Using a red flashlight or headlamp helps preserve your night vision, making it easier to see faint stars, galaxies, and nebulae after your eyes have adjusted to the darkness.
The best conditions are on clear, moonless nights away from city lights. Plan your trip around the new moon whenever possible, and check the weather forecast in advance. Autumn and winter often provide especially clear skies in many regions, although excellent stargazing is possible year-round depending on your location.
Many beginners start with the Big Dipper because it’s large and easy to recognize in the Northern Hemisphere. From there, you can locate Polaris (the North Star). Other beginner-friendly constellations include Orion in winter, Leo in spring, Scorpius in summer, and Pegasus in autumn.
Yes. Astronomy apps such as Stellarium, SkySafari, and Sky Guide can identify stars, planets, and constellations in real time using your phone’s GPS and compass. They’re excellent learning tools, but many astronomers also recommend using a printed star chart or planisphere to develop long-term navigation skills.
Most people need about 20–30 minutes for their eyes to become fully dark-adapted. During this time, avoid looking at bright screens, vehicle headlights, or white flashlights, as even brief exposure can significantly reduce your night vision and require additional time to readapt.